Instruction
Getting ready
-
Go to all-hw.com and open the Boards page. Choose the board you need and book it.
-
Visit the Connection and Tools page and click the “Download Demo Project” link to download the archive with the project.
-
Open the downloaded and extracted project in MCUExpresso IDE and build it.
Setup connection
To work with the board, you need to configure your IDE:
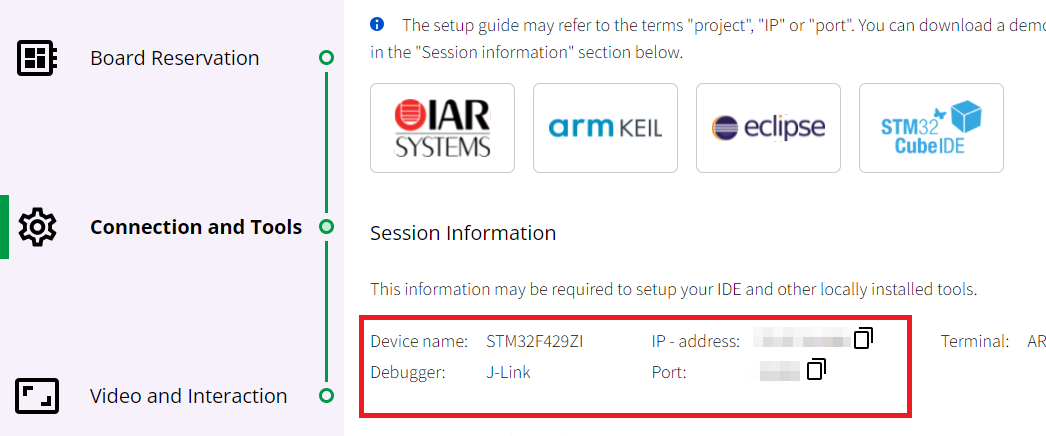
- Get the target information from the Connection and Tools page: device, IP address, and port:
- Add the new “Debug Configuration” for GDB SEGGER J-link Debugging option:

- Well done! Let’s try the remote debug session: you can add breakpoints, watch expression etc.
The duration of the session may be limited by the board owner. For example, the owner may choose to set a maximum of one hour per session. When the session ends, the info message will appear.
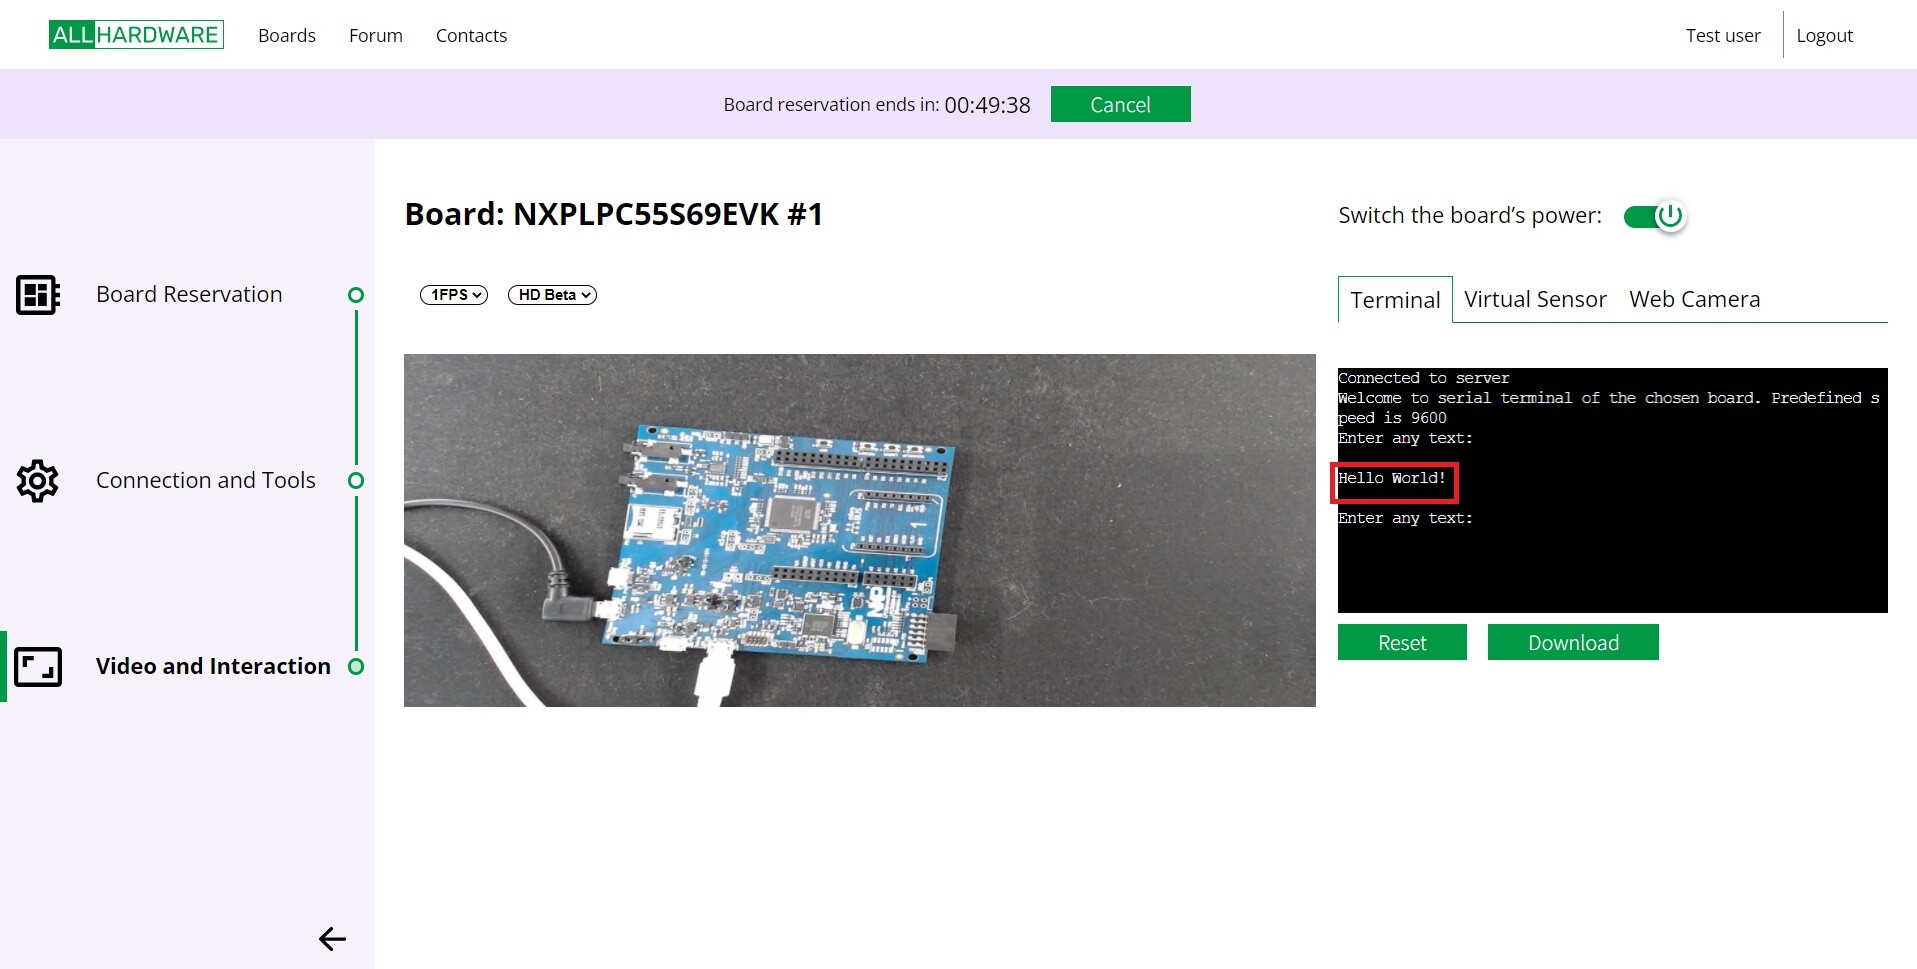
You can also observe the booked board and interact with its UART on the Video and Interaction page:
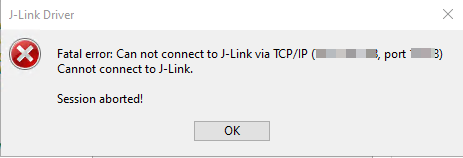
If J-Link GDB Server timed out while starting
- Run Cmd.exe and execute the following commands:
cd «JLink_Path», where«JLink_Path» is a path to JLinkGDBServerCL.exe
JLinkGDBServerCL.exe -select IP=<IP>:<Port> -device <STM32F429ZI> -endian little -if SWD -speed 4000 -noir -LocalhostOnlyWhile using port forwarding, use localhost as the IP-address and <serv_port> as Port.
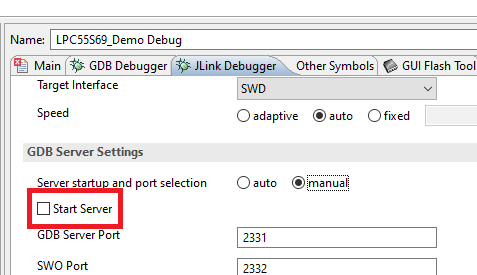
- Open the “Debug Configurations” window for the created configuration.
- Uncheck “Start Server” on the “JLink Debugger” tab.
- Click “Debug”.