Port forwarding
If you do not have PuTTY, download it from official website.
Tutorial video

Instructions
- Download SSH key file
- ssh_port = ssh_port
- serv_port = serv_port
- user = user
- rem_ip = rem_ip
Link to SSH key file, ssh_port, serv_port, user and rem_ip are shown on the Connection and Tools page.
-
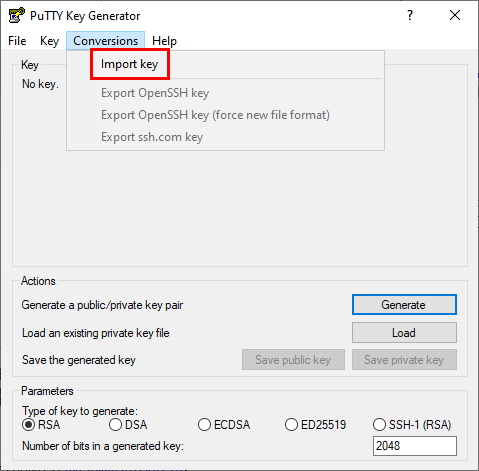
Run PuTTYgen.
-
Select “Conversions→Import key” 1. command on the PuTTYgen menu and select the downloaded file as the key.
-
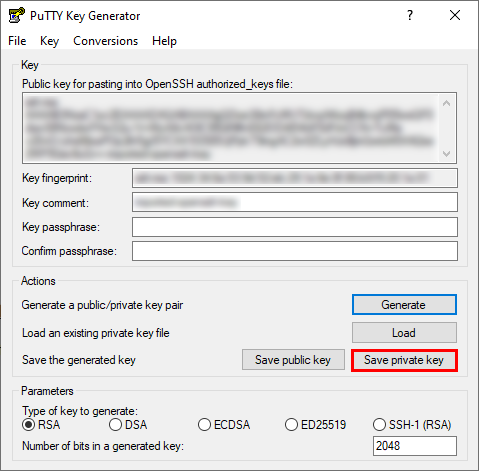
Save the generated private key.
Do NOT click on the “Generate” button.
-
Run PuTTY.
-
On the configuration tree, select “Session” branch. Specify host name in the corresponding field using the user@rem_ip format. Specify ssh_port in the “Port” field. Make sure the “Connection type” radio-button is at "SSH".

-
On the configuration tree, select “Connection” → “SSH” → “Auth” branch. Specify file path for the generated private key in the “Private key file for authentification” field.

-
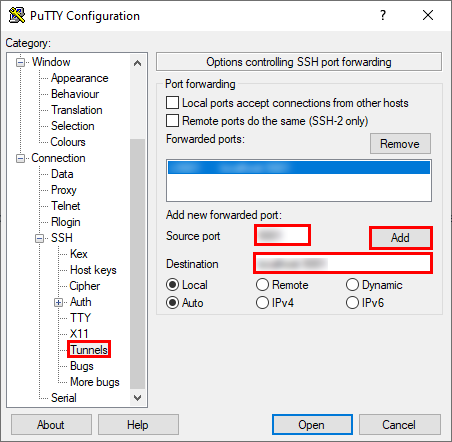
On the configuration tree, select “Connection” → “SSH” → “Tunnels” branch. Specify serv_port in the “Source port” field. 1. Specify destination in the corresponding field following the 127.0.0.1:serv_port format. Click “Add”.
-
Click “Open”.
Do NOT close the black window until debugging is over.
While using port forwarding, use localhost as the IP-address and serv_port as Port.